Pages

Wednesday, February 29, 2012

CABBAGE AND BROCCOLI ON THE MOVE.

Today, Feb. 29, 2012, our cabbage and broccoli seedlings out grew their nursery. 
The following is the blog of their birth.
http://organicinstlouis.blogspot.com/2012/02/seeds-sprouted.html
 It was moving time.  We have different sizes of the Styrofoam planting trays.  We move the plants up to the next size.  It has been at least 8 years since we purchased our trays.  I don't remember who made them.  I do remember they were $5.00 each (that was wholesale).  I was worried it would be a wasted expense.  This wasn't the case.  They have more than earned their keep.

The following site has some trays which are very similar to ours. 
Ours have square holes instead of the round ones.
http://www.quickstartgardensupplies.com/index.cfm?fuseaction=category.display&category_id=23


The trays are supposed to keep the roots either cool or warm.  In other words, keep the temperature from extreme fluctuations.  The trays are designed to be placed on rails so the drainage holes are open to the air.  The circulating air stops root growth through the holes, effectively root pruning the plants.  It encourages the roots to develop and fill the planting hole. 

The seedling to the left was planted in a soilless mix with no supplemental feeding.  It is 10 days old.  The temps in the room where it was at were at about 63 degrees.

The root development is perfect.  I never have this nice of roots when I use other trays or containers. 

This is a very strong plant  and will be very successful when transplanted.  Not susceptible to moving shock.


This picture shows the small cells the plant came from and the cells it will be transplanted to.  You can see the second set of leaves. 

The plants have been under 3 sets of shop lights.  They are positioned with their leaves within a half inch of the light source.  They are regular fluorescent bulbs except for one bulb which is the full spectrum bulb.  We found when we used all full spectrum bulbs we didn't get the stocky growth we wanted.  They tended to be spindly.

I transplanted all cabbages and broccoli.  I will keep their same numbers throughout the growing cycle.

                                                                                                  Feb.     29   
1.  Gurney's 2007 "HYBRID PACKMAN BROCCOLI"   Destroyed any sprouts,  due to poor germination/stunting
     http://gurneys.com/

2.  Shumway 2007 "GREEN GOLIATH BROCCOLI"       Destroyed any sprouts,  due to poor germination/stunting
     http://www.rhshumway.com/

3.  Gurney's 2007  " HYBRID CORONADO CROWN"     Destroyed any sprouts,  due to poor germination/stunting
    http://gurneys.com/

4.  Henry fields 2009 "PREMIUM CROP BROCCOLI" Destroyed any sprouts,  due to poor germination/stunting
     http://www.henryfields.com/

5.  Henry Fields 2007 "ARCADIA BROCCOLI"                                  36     
    http://www.henryfields.com/

6.  Totally Tomatoes 2010 "RUBY PERFECTION CABBAGE"          24
     http://www.totallytomato.com/

7  Baker Creek " EARLY JERSEY WAKEFIELD CABBAGE"           17
    2012  http://rareseeds.com/ 

8  Baker Creek " EARLY JERSEY WAKEFIELD CABBAGE"            20
    2012  http://rareseeds.com/  

Feb 29:  All plants were installed in their new cells.  I used the soilless mix  by 1/2 weight and the other half was a mixture of equal parts: dried sifted manure, compost, rice hulls, and garden soil.  after the plants were planted they were watered in with fish emulsion (1 TBS to 1 gallon well water).  Left is the flat with the plants.

For more blogs by me visit at:
A blog mostly about quilting, but cooking, poetry, prose and a little gardening,
Not a garden blog.  There are articles which have nothing to do with creating or gardening. 
There are blogs on the new born baby kittens we found and are mothering.  It is a blog where I will sometimes voice my opinions which will always be environmentally friendly.
As always, any pictures or writings are my own, if not credit will be given to the contributor. Please do not use without permission.


Saturday, February 25, 2012

GROWING LETTUCE

Edits and additions will  be in the color which matches the date.

The picture on the left is of lettuce, April 2009, in our Cold frame/Green house at 9A.M.  It is a double layer plastic hoop house.  The light green red tipped lettuce on the right is Prize head.  The darker green on the far left is Bibb.  The Red in the middle is probably Lolla Rossa, a small, very frilly dense lettuce.

You can see the space heaters sitting around.  Occasionally we have dips to 0 in our valley in April.  The hoop house doesn't maintain the heat at those temps at night.  We splurge if we see it will be that cold and turn on the heaters late in the evening to keep the plants from getting freezer burn.

I planted my seed on February 21, 2012.  Normally I would use a propagation chamber to start them in.  The following is the blog I wrote about our propagation chamber we use: 


I didn't use the chamber this time because I wanted to see what results I would have with out it.  Another change I made in my routine was I didn't follow moon signs.  I usually plant seed for plants which grow above ground before the moon comes full,  the dark side is reserved for root crop seed.  When I planted the lettuce the moon was definitely going to the dark side. 

We have a room with large windows which we keep on the cool side.  It is around 62 degrees. 
I figured they grow outside in the cold ground I would try it with out the heat source
and see how fast my seeds sprout.  All seeds were planted in plastic trays.  The ones the chocolate covered grahams come in. They were slipped into a gallon plastic bag to keep the humidity up.  they were planted in thoroughly moistened, soilless potting mix of perlite and ground peat moss.  I pressed a trough about 3/8 inch deep into the packed "soil" and lightly covered the seed(just barely).  Then I lightly pressed the covered seed.  I did not water it in because the medium was wet.

GERMINATION CHART
I planted approximately 25 seeds in each tray. 
(I used tweezers but sometime the color of the seed made it difficult to keep track of how many went in.)
Seed planted February 21, 2012
 Germination began on FEB 22.  I didn't count the seedlings because they were so tiny.  I did make a note of which boxes had no germination.  The chart has the variety, the seed company, the date purchased, and the seed color.   I will chart the seed up through their transplanting into the ground.  There will be notes following the chart typed in the color of the day. 

                                                                                                  FEB  22         25       29      Mar 1                                                                                                                                                       moving day
The green name, below the name, is the abbreviation used on the labels used in the trays on moving day.

1.  RED ROMAINE         Baker Creek  2012    white seed                           17        22             22
     RED
2.   MARSHALL COS      Henry field    2010    white seed               0           0          3            

3.  PARIS WHITE COS   Shumway      2012    white seed                            22        22            22
     COS
4.  BUTTERCRUNCH     Shumway      2012    brown seed                           23        24            23
     BC
5.  BURPEE BIBB           Burpee          2012    brown seed                           22        23            23
     BIBB
6.  PRIZEHEAD              Shumway       2012    white seed                            24        24            24
     HEAD
7.  FOUR SEASONS       Burpee           2012    black seed                            17        20            20
     4
8.  ANNAPOLIS              Veseys           2010    brown seed            0              1          7

9.  VULCAN                    Veseys           2010    white seed              0              0          0 

10.  SANGRIA                Veseys           2010     brown seed            0             1          8

11.  REVOLUTION         T&M              2008    black seed      0              0          0

Feb 22:  The open (no count) is because they were so numerous and close together it was difficult to count.

Feb 25:  They are very tiny maybe 1/8 inch.  Today it is very cold after a fabulous 60 degree day on Thursday.  So far the way the weather is looking I am glad I am starting the seeds early.  It looks like if I can get a garden area dear proofed I can put some plants out.  (but this is St. Louis...wait 5 minutes and the weather changes).

Feb 29: Some of the older seeds did sprout.  The sprouts are on the deformed side and staying very tiny.  I don't have any seed from 2011.  The above tells me, lettuce seed older than 2 years is not to be counted on no matter how good the storage conditions are.

The picture on the left is the seedlings today.  I re-use domed pastry containers to put the trays in.  The trays are the plastic inserts which hold chocolate covered graham crackers.  I poke holes in the corners of each tray so they will drain and not be soggy. The domed carton keeps the surface damp for germination and provides growth room till they get their second leaves.  these I noticed are at that stage.  I will be transplanting them today if I have time after I transplant the cabbages and broccoli:  http://organicinstlouis.blogspot.com/2012/02/seeds-sprouted.html


Picture on the left is a close-up of the closed container.  The right is the open container showing the little trays. 

We are always keeping our eye out for container to reuse as little green houses.  (The rotisserie chicken boxes are good for rooting woody herbs in.)

March 1:  Today I moved the seedlings.  They were just starting to show the bud of the second set of leaves.  I normally wait till the second set is well on it's way but the stalk of the plant was tending to legginess.  I used the smallest cell Styrofoam tray I had.  It was difficult to get the root mass in the holes.  Next time I plant lettuce seed I will direct plant these cells and cover the tray with plastic wrap.  I was using tweezers anyway to pick up the seed and put it into the cracker trays.  (The only advantage so far I have seen is that I could have put the trays in my propagation chamber which is warm.) We had fast germination at the 60 degree room temperature.

The buttercrunch had one seed that was recently sprouted and had almost no roots so I destroyed it rather than transplant it.  The other 5 varieties what growth there was was stunted I did not transplant them.  I will be feeding the birds the remaining seed. (This is another advantage to being organic.  You can give your old seeds to the birds).

When I moved the transplants to their new home I didn't have my list.  I made tags to label the rows.  I abbreviated their names for the tags.  For this tray I will use this system but I will still use their number in the above list for identification.


The pictures and writings on this and any of my blogs are my own.  If you would like to use them please contact me for permission.  (If I use something from a source not my own I will make note of it ). 

To see more of my blogs go to:
Check out my kittens at:
  blogs about My Courtship in 1963 and My most embarrassing moment.

Or my projects at:
Sewing, Quilting, Cooking, Poetry and prose and a little gardening
new blog February 16, 2012 "5 Panel Boxer Shorts: tutorial"

Sunday, February 19, 2012

MY GARDEN'S BEAUTY

Entering my garden's gate, the view is this,
The beginning of a tour you won't want to miss.
The rose is a climber of short stature,
Not very tall when it's fully mature.

Day lillies, it shares its bed with,
Were, a long time ago, given me as a gift,
They've still to amaze us with their bloom,
When we'll be crunching on them soon.

Across from this bed is a rose, whom I've forgot,
Years ago from a chain store I bought,
"Intrepid" might be who she is,
This isn't a poetic quiz.

Around the corner, a young clematis, beginning to bloom,

The Columbine, on a rainy day, brightening the gloom.

A peony afraid the rain will dash it to the ground,
On it's petals, a fly resting, is to be found

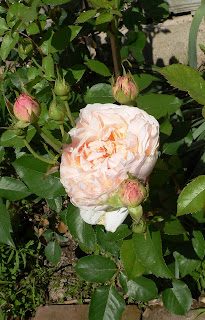
A couple of David Austin roses have I,
Their fragrance isn't overwhelming, oh my.
When they open, like a pate' choux,
They can be described as frilly froo-froo.

This was our garden in 2010.  Last year we did no gardening at all.  We will be beginning the arduous project of putting it back together.  It is hard to believe but it looks like only  one of the roses died.  I will probably have to replace all the herbs. 

My brick walls, with the freeze and thaw and the tremendous rains we had in 2011, have fallen in total disrepair.  They will have to be rebuilt.  This will be like house cleaning..lol..You need to move the furniture around.  In this case I am sure beds will be redesigned.


For more blogs by me visit at:
A blog mostly about quilting, but cooking, poetry, prose and a little gardening,
New blog tutorial on how to make 5 panel Boxer Shorts.
Not a garden blog.  There are articles which have nothing to do with creating or gardening. 
There are blogs on the new born baby kittens we found and are mothering.  It is a blog where I will sometimes voice my opinions which will always be environmentally friendly.
As always, any pictures or writings are my own, if not credit will be given to the contributor.
Please do not use without permission.

SEX IN THE CITY

Technically we live in the country, at least it was 25 years ago.  The city has moved to us.  It grew and encroached on the property across the road.  The town, at the intersection of the interstate, annexed a mile of road.  We are at the end of that acquisition.  One hundred and eighty acres of an old mountain across the street was bulldozed and blasted.  They removed the top of the hill and shoved it down into the valley.  Removing all the old forests with the rocks.   The only logging done was the removal of a few large walnut trees.  The oaks and other hardwoods were cut and put through a shredder.  No one was even allowed to come in and harvest them for firewood.  The chips were buried in with the land fill rock.

Our little bit of country sits overlooking the subdivision .  There is a 5 acre pasture which fronts the road.  Since we don't have grazing animals anymore it is no longer cut for hay.  It has been let grow up in native plant species.  We mow around them when we see them bloom hoping they will grow into a larger patch of flowers.  In the middle of our field we have a very large stand of milk weed.  We left it there because of the butterflies it brings.  We never realized how teeming with life it is.  It's its own little community, each life form competing for its own real estate.   

Asclepias syriaca L. common milkweed
We never realized it would also be an attractant for our arch nemesis the Japanese beetle.  They are such exhibitionists.  Actually though they do not seem to like the milk weed.  It is the weeds which grow in between the stalks they seem to be attracted to.  To possibly alleviate this problem we will mow the area when winter comes.  Next spring we will watch for the milk weed to sprout and when it does we will mulch with chips.  (I'm not sure what milk weed seeds requirements are, I don't want to mulch till I see them.  I would hate to suffocate them).  I have never seen milk weed growing around the chip piles, I think they may need light to sprout.
Japanese beetles procreating.


Species Popillia japonica - Japanese Beetle

They are native to East Asia, they were introduced in north america in 1916, with nursery stock. They hatch in June and July.  Larvae feed on roots of plants. Adults feed on foliage and flowers.  The Grubs feed on roots, then  hibernate when cool weather comes. 
Japanese beetles are always the scourge of our gardening.  They are around for an extremely long six weeks; devouring most all vegetation, especially flowers (roses seem to be a favorite).  It seems they hatched earlier this year. 

There is not much you can do about controlling Japanese beetles.  We have used the traps.  It is said they  attract the "bugs" to your area. I don't know if this is actual truth.  They do catch a lot.  I will say they are a very nasty proposition to get rid of.  One year we had so many beetles we were emptying them once each day.  We emptied them because to replace the bags was getting  expensive.  At the same time we hand pick the beetles. 

This is how we dispose of the beetles.  Use a 5 gallon bucket which has a lid; we use Kitty litter pails.  Fill it a fourth full of water, empty the bag into it and clamp the lid on fast (the reason you do it fast is the bugs in the bag are alive and they will fly out).  Shake the bucket around getting the beetles wet.   You can fill it 2/3 full before emptying but I warn you when the bugs die it is the most vile smell.  It takes approximately 3 days for all the bugs to die (3 days after the last addition.)  We empty it a long way from the house.

Hand picking the beetles: we use a plastic 2 cup measuring cup with a handle.  We put a couple of inches water in the bottom and hold the cup under where the beetles are and  tap or shake the branch and they fall into the cup. The year we were emptying the bags each day we were hand picking 3 times a day.  The two cup measure was filled each time.

If you are in a subdivision and have a small yard you can treat with "milky spore ".  The reason I say small lot, Milky spore is very expensive.  It's one plus is; you only have to do it one year.  It lives in the ground after that.  Milky spore attacks the grubs in the earth.  If your neighbors have the grubs then the beetles will also come to visit your garden too.  You need to ask the neighbors to treat their yards too.  We don't use it because we would have to treat 15 acres of pasture with it.  Grubs are the progeny of the beetles (they grow up to be Japanese beetles).

RED MILKWEED BEETLES
ASSURING US OF ANOTHER GENERATION
 Species Tetraopes tetrophthalmus - Red Milkweed Beetle
The larvae feed on  Common Milkweed (A. syriaca). They lay eggs on stems near ground or just below surface. Larvae bore into stems, overwinter in roots, and pupate in spring. Adults emerge in early summer.
From what I read when looking for the identification of this beetle, we will be raking up and cleaning the debris from the area in early fall.  Milk weed is a perrineal, we won't have to worry about removing too many of the seeds and not having a field next year.  This species seems to be only a threat to the milk weed family.  This is the first year we have seen it.
 ADULT GYPSY MOTH

I found this site when looking for the red milkweed beetle.  http://bugguide.net/node/view/15740  It seems to be a very in depth Identification site for insects.
The pictures on this and any of my blogs are my own.  If you would like to use them please contact me for permission.  (If I use a picture from a source not my own I will make note of it with the picture.). 

To see more of my blogs go to:
Check out my kittens at:
  blogs about My Courtship in 1963 and My most embarrassing moment.

Or my projects at:
Sewing, Quilting, Cooking, Poetry and prose and a little gardening
new blog February 16, 2012 "5 Panel Boxer Shorts: tutorial"


Friday, February 17, 2012

CUCUMBERS: NOT JUST FOR SALADS

I know it's not time to plant cucumbers but I am always dreaming.  My dreams are fired by the seed catalogs.  This year we did not order fresh cucumber seeds.  Hopefully the ones we have will grow.  Even if they grow we have to plan a course of action against the "bugs".  Spotted cucumber beetles and Japanese beetles, and then there are the funguses and the powdery mildew.  Till then though I can plan what I am going to be doing with cucumbers picked fresh off the vine.  Yes, I am an optimist.

This winter I had a cucumber left over and it was a little over the hill and I wanted it out of the fridge.  I was cooking supper and I wondered how it would cook.  I sauteed a huge onion in a tablespoon of butter (it seems most recipes I do start with diced and sauteed onions.)  While they were cooking I peeled the cucumber and split it down the middle, scraped out the seeds.  I proceeded to cut the cucumber into 1/2 inch dice.  I put the diced cucumber in with the onions.  Kept the lid off the pan and increased the heat a little.  I cooked the cucumbers till they were fork tender.   At this point I put 2 rounded Tablespoons of flour in it and stirred  it through.  

The reason I put in the flour was to thicken the cup of chicken stock I was adding (have extra stock ready in case it is too thick).  I have a totally thawed 16 ounce pkg of frozen peas ready.  Before you add extra stock if it is too thick,  pour the package of thawed peas in with any liquid which melted off them.  Stir the peas through.  If your sauce is still to thick add some more Stock.

Adjust your seasonings and serve.  Any left overs re-warm well. 

You have just made a creamed dish with out adding too many fat calories because you only used a Tablespoon of butter for several servings.  The sauce stuck to the veggies instead of laying in the bottom of the bowl when you served yourself.  For us the dish was extremely enjoyable. 

What does a cooked cucmber taste like.  Start with the texture.  The texture is not like squash.  It didn't fall apart or get mushy when cooked.  It did not take on the flavor of the sauce or the other veggies.  It was a sweet taste like peas are sweet, but you knew you were eating a cucumber.  The cucumber takes on a translucent look when it is cooked.

A recipe from my garden to you.  I can't wait to try cucmbers 100's of ways.

For more blogs by me visit at:
A blog mostly about quilting, but cooking, poetry, prose and a little gardening,
New blog tutorial on how to make 5 panel Boxer Shorts.
Not a garden blog.  There are articles which have nothing to do with creating or gardening. 
There are blogs on the new born baby kittens we found and are mothering.  It is a blog where I will sometimes voice my opinions which will always be environmentally friendly.
 
As always, any pictures or writings are my own, if not credit will be given to the contributor. Please do not use without permission.

Thursday, February 16, 2012

CABBAGE AND BROCCOLI SEED STARTING

Published February 16
Notes at the bottom of the blog are color coded to the date they were observed.
Edits and additions February 18, 2012
Edits and additions February 20, 2012
Edits and additions February 22, 2012
Edits and additions February 28, 2012

If any thing will give you an adrenalin rush, seeing seeds sprout will (at least it gives me a rush).  Sunday afternoon we put cabbage seeds and broccoli seeds in a seed flat.  The flat has 242 cells in it.  It is Styrofoam so the soil temps stay even.  We use a soilless mix for starting seeds.  Using the soilless mix lessens the probability of damp off.

We planted this flat on Sunday February 12.  The soilless mix was warm when we put it in the cells.  It was gently packed and the seeds were dropped into holes poked by a chop stick.  Then they were covered with mix.  We covered the flat with Plastic wrap.  It was place in a room with a temperature of 63 degrees.  I have been checking them everyday and on February 16,  I was rewarded with sprouting.  We planted 7 varieties of seeds.  Some of them were old seeds.  


We numbered the edge of the tray (see the above photo).  We kept a row free between each variety.  We didn't want to have any mix up of seeds and plants when transplanted (this has happened before!).  I hate not knowing what we are planting.

The seeds in the photo on the left are Early Jersey Wakefield from Bakers Creek.

Because the planting medium was very moist I did not water in the seeds.  Today when I uncovered the sprouting flat I watered all cells (I have found when the empty cells are not watered too, the cells seem to dry out faster.)  I found the best thing for watering the cells.  A spice jar with a lid which has holes in it.  I used one which also had the flap you close over the holes.  When I went to water them with it, it was so easy.  I just pushed on the flap and it let out a little water at a time.  Each cell was able to be watered without washing any of the contents of the cells out with too much water.  BTW..under the flat we have newspaper on plastic. 

The trays are designed for green house seed starting.  They are supposed to be set on runners exposing the bottom of the tray.  When the roots grow down to the drainage hole the air stops them from growing out, effectively root pruning them.)  It makes them set more roots for a stronger transplant.  We will put the trays up on a 1/2 inch board so we can get the same effect.

Why are we starting them so early?  The weather in the St. Louis area has been very mild.  If it continues we will be able to plant early.  If not and we get a bad streak of weather we have the cold frame/green house.  So far the rosemary plants and Devils backbone are still alive and the banana plants seem to still have plenty of life.

List of Seeds planted, the numbers correspond to the numbers on the tray pitured above:
The older seeds were planted 2 in each cell. There can be 44 seedlings of each variety.
The colored numbers are how many that sprouted.  I was thrilled to see sprouts after four days.
                                                                                                            FEB 16       18     20     22    28
1.  Gurney's 2007 "HYBRID PACKMAN BROCCOLI"             22 cells   0         0        0       1       2
     http://gurneys.com/

2.  Shumway 2007 "GREEN GOLIATH BROCCOLI"                22 cells   0         0        0       5       18
     http://www.rhshumway.com/

3.  Gurney's 2007  " HYBRID CORONADO CROWN"             22 cells    0         0        0       2        5
    http://gurneys.com/

4.  Henry fields 2009 "HYBRID PREMIUM CROP BROCCOLI"22 cells  2      32      41      43       42
     http://www.henryfields.com/

5.  Henry Fields 2007 "ARCADIA BROCCOLI"                       22 cells    11      35     36      37       36
     http://www.henryfields.com/

6.  Totally Tomatoes 2010 "RUBY PERFECTION CABBAGE"  22 cells   1      21     21      26       24
     http://www.totallytomato.com/

7  Baker Creek " EARLY JERSEY WAKEFIELD CABBAGE"   22 cells    7     16     16      16       17
    2012  http://rareseeds.com/  1 seed per cell

8  Baker Creek " EARLY JERSEY WAKEFIELD CABBAGE"   22 cells    6     17     19      21        21
    2012  http://rareseeds.com/  1 seed per cell
I received my order from Baker Creek in less than 5 days.   I was impressed with the lovely packaging.

February 18:  The number of sprouts showing includes the sprouts from the 16th.  I am disappointed the top 3 haven't shown any sign of growth yet.  The Green Goliath broccoli is quite productive in the garden with huge heads.  I will have to order new seed for fall production. 

February 20:  Yesterday It was one week since we planted the seeds.  The first three have shown no sign of germination. 

The picture on the right is the seedlings today.  The seed was planted on February 12.  The cells are 1 inch square.  The seedlings are 1 1/4 inches high. 

February 22:  I had a surprise when I went to count the seedlings.  The first three are showing some activity.  It is only a couple but it does show some hope.  The seeds packets say 6 to 10 days..and it was 10 days  today..maybe some more will sprout.

February 28:  The second set of leaves are showing on the sprouted seeds.  when I counted I seem to have come up with an under count on several varieites.  I didn't notice any dying so I could have miscounted before.  I will take a picture of them tomorrow before I transplant them (recounting them at the time.)  

The late growing sprouts will, of course, stay in the flat.  Those which have germinated don't look so "well".  some of them look stunted.  #2 seeds do have some healthy looking sprouts. 

Now to make plans to catch the ground hog who will be enjoying the fruits of our labors
if we don't catch him.


For more blogs by me visit at:
A blog mostly about quilting, but cooking, poetry, prose and a little gardening,
New blog, tutorial on how to make 5 panel Boxer Shorts.
New Blog about dolls.
Not a garden blog.  There are articles which have nothing to do with creating or gardening. 
There are blogs on the new born baby kittens we found and are mothering.  It is a blog where I sometimes voice my opinions which will always be environmentally friendly.
As always, any pictures or writings are my own, if not credit will be given to the contributor.
Please do not use without permission.