Pages

Thursday, December 16, 2010

WARNING, THIN ICE!

As you can see from the blog title we have been introduced to the first ice situation.  there was only about 1/10 of an inch of ice but it has caused a major traffic problem.  Starting at 7 o'clock last night.  We don't live too far from the interstate 44.  There was a jackknifed tractor trailer going west on 44 and it backed up the traffic for over 7 miles.  The people sat still for over 3 hours polluting the environment (wishing they were already to their destination). 

Needless to say with our quarter of a mile drive Hunny is waiting till later to go in to work.  Right now he is walking carefully down the drive spreading ashes from the fireplace hoping to give some traction or to start the melting process.  Being it is still around 12 degrees in our valley I doubt that is going to happen.  The drive is at least a 45 degree slope at the top and at the bottom of the 45 is a left angled turn.  If you don't make the turn, you are plowing a furrow down a 60 degree slope.

The garden is covered in the light snow from 3 days ago  The ice is sealing the crust.  All the barn cats are snuggled in their tents inside the barn.  Yes we make little cubby holes for them.  They maybe wild, but they keep the snakes and mice away and they use the litter box in the barn so we take care of them.  We feed them and there are lots of critters on the ground for them to hunt.  We have been very fortunate They do not seem to relish our birds.  We only find evidence of less than a bird a month demise.

Wish I had some photos to share,
The bird feeder is quite busy today,
They fly in and out, don't seem to care,
Don't even stop, a thank you to say.

The cardinals threaten the jays,
The chickadees could care less,
The nuthatches just want to play,
While the snowbirds join the fest.

Popcorn and dog food are a woodpeckers treat,
The small birds love what our parrots don't eat,
Fresh water is handy in a bowl near by,
We've only seen little birds give it a try.

Please give feeding them a try,
Black oil sunflower seeds are the best to buy,
They attract the most variety of all the seeds,
Get ready to see fun antics and ridiculous deeds.

Other Blogs by me:
http://glosgarden.blogspot.com/

http://gloriouscreations.blogspot.com/


Friday, December 10, 2010

COEXISTING WITH BEASTIES

Some how coexisting is a strange choice of words.  Most of the beasties around here take their quarter measure and my measure too.  We have both beneficial and detrimental insects and amphibians and mammals.  I am going to take time to share with you some pictures of our "Friends" and "Acquaintances".

This mature Mantis is perched on one of my David Austin roses.  This year I have seen baby mantises every where.  They are only an inch long, exact replicas of their Moms and Pops.   I love to watch them when they are stalking their prey.  Swiftly they grab them and give them a crunch.  It's like they are dining on a lobster "Splash" style (remember the Tom hanks movie with Darryl  Hannah".
One day while mowing in the lower pasture I spied a wondrous sight. It was  a "wonder" I saw it at all.  I was edging beside the area where I dump the grass clippings.  Growing along the edge were some Daisies. On one of the petals was a Crab Spider.  I did not own a camera at the time (that has since been rectified). 

I called my husband and told him I wished he was home to take the picture.  I told him to check when he came home to see if the spider was still there.  Wonders of wonders, four hours later the wind had not blown him away and he had not ran off chasing his next meal.  
The next beastie is what got me to thinking about writing this blog and sharing some of our friends.  Yesterday while bent over pulling weeds, I was stung on the posterior.  Our friendly neighborhood wasp decided I was threatening his territory.
This wasp was in the goldenrod last year.   We have found a fix-it for when we do get stung or bit by insects.  It works every time we have tried it.  (We used to raise bees and an old time bee keeper told us about his solution to the painful prospects of getting stung.)

When you get stung, head under your kitchen sink.  Grab your jar of cleaning Ammonia.  It is preferable to have non-sudsing, but the sudsing works too.  Even a product like floor polish with Ammonia "D" worked in an emergency.  (I don't recommend using off products though, LOL.)

Saturate a cotton ball with ammonia.  Hold the cotton ball on the sting or bite for 5 minutes.  Pain relief is usually immediate.  If you get stung on the face wet cotton balls with water and cover your eyes and nose.  The fumes will not be good for them.  Other wise I have never noticed any detrimental effects to the cotton ball saturated with ammonia. This should be done within the first 20 minutes of getting stung. 

This leopard frog travels all over my garden.  He jumps out and startles me at the most inconvenient times. 
He is in one of the many "mini" pools I have around the garden.  We used to have farm animals, their feeders remain.  The round ones are made from recycled tires.  They are about 5 inches deep.  I fill them with rocks and water.  The butterflies, dragon flies and frogs love them (the barn cats do too).  Around eleven in the morning he is usually soaking in the water basking in a sun beam.  He seems to know I wash the pools each day. See the purple reflection in the water.  This pool is under my Beauty Berry Bush.

My Echinacia is on it's last leg.  The horrible Japanese beetles have dined on its petals.  These Hornets don't seem to mind.  They are collecting pollen and nectar for themselves.

One of the most look forward to beasties every year is the orange garden spider.  Usually before I see her I see her web with the zipper like weaving.

She is the spider the story Charlotte's web was written about.
She is wrapping her lunch up for later.
Her sister lives in the green house and she has laid her eggs in a secure nest in a protected environment. 
Coexisting does not even describe our relationship with the ground hog.  We wish there was not a relationship at all.  We have had lots of ground hogs but there has been one who has been around for at least 3 years.  He weighs, we guess from his size, at least 40 lbs (we seldom see him now).  We use a raccoon trap to try to catch him. He is so big, he realizes he can steal the bait and his rump will hold the door open.  He just backs out of the trap (after eating the apples we baited it with).  He seems to know when we are at the barn.  The following is a minute portion of the damage he does every year.
 
While taking a picture of a bean blossom, this pest added insult to injury.  He flew in to taunt the photographer.  We have a large population of these spotted cucumber beetles, although this year it seems there are fewer than in previous years.
This blog would not be complete with out a discussion of mosquitoes and chiggers.  Summer in Missouri is not summer without them.  I grew up in the boot heel and the mosquitoes were rampant, and the chiggers, well this unseen pest made life miserable.  

I have a preventative of the chigger blues.  Do not ever wear clothes that you wore the night before, even if they look perfectly clean.  chiggers hide in the seams and when you put them on the next day the little buggers are starved and come out to dine on your flesh.  When I spend all day in the yard I always change clothes (down to the underwear) halfway though the day.  since I began this I haven't had a single chigger bite. 

To fight off mosquitoes I don't invite them.  I don't wear any lotions or deodorants with fragrance.  For the afternoon change of clothes they are always white or light colored, over sized, very loose.  Dark colors invite them to bite and tight fitting let them get close enough.  If it is humid or your clothes are damp you will for sure get bitten (Have you noticed how around a source of water they are congregated?).  I have to admit there are those people (like my hunny) Who, no matter what they do, are bitten).

Hopefully next gardening season a couple of my hints
will help you coexist with your beaties.


Friday, November 12, 2010

BEAUTY UNDERFOOT

Watch where you step,
Amazing things are there,
Don't disturb the forest floor,
Walk with care.
Leaves on the ground,
Set a fiery stage,
For the autumn mystery,
The wind will turn the page.
Exposing surprises
For me and you to see,
Tread lightly in the woods,
 Awesome sights await thee.
 
 
For more blogs by me, visit at:
A blog mostly about quilting,
but cooking, poetry, prose and a little gardening,
New blog, tutorial on how to make 5 panel Boxer Shorts.
New Blog about dolls.
Not a garden blog.
There are articles which have nothing to do
with creating or gardening.
There are blogs on the new born baby kittens
we found and mothered.
It is a blog where I voice my opinions which will always be environmentally friendly.
As always, any pictures or writings are my own.
Credit has been given to contributions not my own.
Please do not use without permission.

Friday, October 22, 2010

FALL FAILURES

This year has been the absolute worst gardening year we have ever had.  If we weren't fighting bugs we were fighting diseases.  Our flowers even suffered, especially roses.  If any make it through to next year I will be surprised.  I had too much to do to give them the attention they needed.

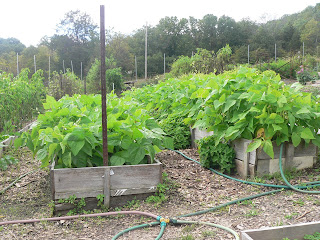
The picture is our beans .

They are one of the successes this year.  I will say I have never had a batch of fall beans be bad or go bad.  The problem with late beans is you may not get any because an early frost may bite down hard.  These beans have had 5 frost mornings.  We have been covering them when It looks like it may be close to that temp.  We found a really great cover for them; Canvas paint cloths.  They were heavy enough a wind did not dislodge them but they weren't too heavy in that they would mash the plants.  Burlap sacking worked well too, but the holes in it did not keep the heat in so there were places on some leaves that got freezer burn. 

We have had wonderful surprises.  Dahlia bulbs which we had been going to throw out because they were so small, we planted.  They were planted in pots and were stunted because I didn't find a place for them till August.  they took off when their feet hit the soil and are blooming their heads off. This picture was taken a month ago.


I wish I had a current pix.  They are blooming ferociously.  They were not covered during the frost and did not seem to suffer.  I thought for sure the plants would be melted by the frost.

So much has happened this year that I should have written about and didn't. 
We did have wonderful garden visitors:
This garden spider was just one of our great visitors.

Thank you for visiting.  Now that things are slowing down I will have time to post the goings on in the garden.  Right now we are cleaning all the debri out of the tomato beds. We still have peppers performing. Till the next revealing trip to our garden. 
May your autmn be as beautiful as it is in St. Louis.

Monday, August 23, 2010

MORE ON THE QUEST

This has been an eventful summer in St. Louis.  The weather has been extremely hot and humid.  Living in a valley has added to the humidity.  Needless to say we have been inundated by every fungus and bacterial infection.  Some varieties of tomatoes  succumbed immediately and we nurtured them hoping to get something for the the work already done. 

The green tomatoes; those that are green when ripe went first.  The few tomatoes we got made us really want to try again next year for more green tomatoes.  We had two varieties, Evergreen and Aunt Ruby's".    In  taste and shape the Evergreen had it all over Aunt Ruby. 

BTW...anticipating the onslaught of the diseases we trimmed all the lower leaves up twelve inches on the plant and mulched heavily to prevent the splash of the fungus bearing water.  The only thing we have not tried this year was cornmeal.  This will be on the shopping list for next year and will be applied to the top of the soil when we plant next year.

We have had great luck with disease resistance in the "Big Mama's".  I used a huge handful of epsom salts in each planting hole this year and we have so far gotten through the summer with no blossom end rot.  (This variety seems to be more susceptible than most.)  Another way to dose your tomatoes is to spray with epsom salts.  I can't remember the amount but it seems it was 1/4 teaspoon for 2 cups of water.  I suggest you google "using epsom salts as a foliar spray" to find the correct amounts.
"Juliet" tomatoes planted late so far have not gotten the different diseases, but the planting 4 weeks earlier did.  I can't compare the two though because the first planting was a double row.  The closeness of the plants could have caused the diseases. 

We had similar results with the "jelly bean" tomatoes.  Except, the first planting was a single row and the second planting was too.  There was a month between the plantings.  The plants in both cases were started on the same day.  BTW, Jelly Beans flavor is exceptional and they are extremely productive on enormous vines.

The planting method we used, which I blogged about in a previous blog,  has worked fabulously.  The earth stayed moist without being soggy.  It drained well when we had gully washers of a rain.  The nicest benefit came when we dismantled the two beds.  After we removed the straw and exposed the dirt, the straw at the base had already decomposed and was ready to till into the dirt, adding the much needed organic matter.

Our favorite long standing beefsteak has failed our conditions for the second year in a row.  We will not be planting "Delicious" again for a while.  This tomato has been our stand by plant for almost 40 years.  Producing 2 lb tomatoes with ease.  This has not been the case for the last 2 years.

A new tomato on the market the last couple of years has been "Rave".  It is the yellow equivalent to the Juliet tomato.  This year it has performed admirably producing 1 ounce tomatoes that do not readily split on the vine.  It is a little susceptible to the diseases but not to the point it debilitates the production.  I recommend picking them before they are ripe.  Ripened in the house they stay firmer.  Vine ripened they are are a softer tomato.  No mater when you pick them they are full of flavor.  Much more flavor than any yellow slicing  tomatoes.  This is our second year growing them.

So far the only large tomatoes that do not have the diseases in profusion (just a little bit) are "Goliath" and "Big Beef".  But they are also not as large of producers as we were used to getting from the "Delicious" tomato.  They do take up the same amount of real estate as the "Delicious" does.

Remember we mixed all new dirt for every tomato bed.  We did not plant anywhere near the area we had tomatoes last year.   We are struggling with the same problems we had last year.  This fall will be a quest for a new location for the tomatoes.   We have an area below our green house but I am not too hep on using it.  It is a great place to encounter mosquitoes so I think maybe the humidity is even higher there. 

I haven't discussed enlarging the garden area with my husband, but ploughing an area out side the fence on higher ground is an option (I think if he reads this, discussion is mute)....Then of course we have to build another deer proof fence...lol.  The fence we have made has worked this year, but it isn't ground hog proof!

Hope you are having better tomato times than we are.

Sunday, July 18, 2010

QUEST FOR THE PERFECT TOMATO

This is a blog about how we changed our tomato planting methods this year.  The pictures will show you what we are doing.  Hopefully this will be the start of something new for us.  It is said necessity is the mother of invention.  Not having enough uncontaminated soil to fill our raised beds led us to this possible solution. 

We are organic and rotate crops.  We have gone to raised beds because we are tired of fighting the heavy clay content of our soil.  It seems the clay ate the dirt we had "cultivated" during the winter.  We decided to contain it.  Yes, we still have disappearing dirt dilemma, but it is not of the proportion of the previous years. 

For years we have searched for the best method to raising the perfect tomatoes.  We have found barring the deer who aren't supposed to eat nightshade plants (they do),  groundhogs who devour them the minute they show color, opossums that take a bite to test it and decide they don't like it, birds pecking at the cocktail tomatoes sipping their juices,  there really isn't one way that is perfect.  Every tomato variety seems to have its own preferences.

We have tried mulching and letting the vines run rampant.  We have also staked and tied each plant.  Everyone who has gardened has bought and tried  those cone shape cages.  We went through them twice.  The second time they were larger and heavier gauge wire and we were told not subject to the weld joints breaking.  NOT...they succumb to the same faults their little sisters have.  We have been very lucky, on two occasions we have been gifted wire cages made from woven welded fence wire.  The first ones I wish I had more of.  They are 30 inches in diameter and 5 feet high.  They have been G-d sends when we plant "Delicious" and "Jelly Bean" tomatoes ("Big Momma" tomatoes can use them too).  These varieties seem to grow as if they were on steroids.  The "Jelly Beans" topped 8 feet last year.   We had to use a step ladder to pick them.  BTW...they also continue to produce on the lower branches.

HOW WE ARE PLANTING TOMATOES IN 2010

Amend your soil before planting.  This year it became a necessity for us.  We had minimum soil to fill our raised beds.  I am very fortunate to have a supply of broken down wood chips (they have been breaking down for three years).  I till the few inches of soil in the bed then add the following.  The amounts are for beds 30 inches wide and in increments of 8 feet (the measurement are for 8 feet).  Two 40 lb kitty litter pails (KLP) of chips, two KLP of dried manure (we used to raise sheep), one KLP of boiled rice hulls, two KLP of peat moss (our soil mix tends to be too well drained so we need extra organic mater).  We are the proud owners of our third "Mantis" tiller.  It is fabulous piece of machinery for working our raised beds.  After tilling thoroughly, rake the bed smooth, water deeply and let the bed sit overnight.  The next morning water again deeply.  This will get the peat and other dry materials saturated.  Wait till evening to plant your bed.  Dig all your holes, then proceed to plant.  The picture to the left is an Evergreen tomato plant removed from the pot.


After removing the plant (Which you watered well earlier in the day...I soak the plant in a bucket of water to remove any air pockets the morning before I plant)  I prepare the plant for its stay in the ground.   All branches that will be below ground will be snipped off.  The root ball, if it is root bound, will be broken up at the base so the roots will grow out from the plant, not continue on their trip around the pot...becoming more and more root bound.

When we plant the trimmed tomato plant we add a handful of Epsom salts and bone meal.  Both boost the plants ability to withstand the onslaught of blossom end rot. Make sure you mix the salts and the meal with dirt before adding to the hole.  You don't want them coming in direct contact with your root mass, it might burn them.
This is several plants ready to be vitamized and hilled.  We have our garden Kitty " Dawn" and puppy dog "honey" supervising. 
This is the bed completely planted with the plants, each hilled to keep them steady for working on the rest of the planting.  Notice, each of the plants have had even more of their lower branches removed, hilling up to the top two or three leaves.  The object is to bury the base of the plant with dirt to the level of the raised bed's side-boards.
We use a hoe (or sometimes just our hands) to pull the amended dirt from the sides of the bed.  We go down to the hard pan earth.  We bring the dirt up to fill the area between and around the plants.  We end up making a "mountain" down the center of the bed.  The idea came from pot culturing tomatoes.  They don't need a huge amount of soil to produce, so it stands to reason neither do garden grown ones.
This is the bed totally hilled.  The shovel is a full size shovel.  It is set there to show you the depth of the sides.  It is now ready to be mulched.
We are packing the troughs on each side, tight with old straw.  Yes, I know people say straw adds weeds to the garden.  It does, but they are so easy to pull.  The idea came from thinking about building with straw bales and their insulating factor.  These beds are 8 inches deep.  We figured not only would it insulate, but it would allow the area to drain as well as keeping the moisture in the bed.
The bed with side mulching completed.
Now that your sides are securely supported you can water the tomatoes in.  I soak the bed thoroughly.  I neglected to say:  in between each plant I make a little trough in the top ridge of the dirt.  It helps to direct the water into the middle of the "mountain", otherwise the water has a tendency to run down the sides of the dirt "mountain".
After you finish watering in the tomatoes continue mulching the entire surface.
Now is the time you want to cage and stake your tomatoes.  Do not wait untill they start growing (which is always instantaneous, especially if it rains that evening).  They will get too big to put on the cages.  We put a "T" post at each end of the bed and another in the middle.  We then feed long boards or conduit through the cages.  We join the boards with a binding of baling twine.  After which we go back to each cage and tie where the board goes through the cage.  The purpose of this is two fold:  we don't have to stake each cage; when we get big winds and the cages are filled with the leaves and tomatoes they don't go over in the direction the prevailing winds are pushing them.

This is a closeup of the tied cages.  You'll have to excuse the untidy weedy beds in the background.  We hadn't gotten to them yet when this picture was taken.  The bed on the left where the soaker hose is stacked is now in peppers and the bed with the white plastic on it has "Big Momma" tomatoes in it.
This is where my pictures run out.  We will take a picture of tomatoes filling the cages and post later this week.  So far this is working very well.  We are having one of the hottest summers in St. Louis in a long time.  The dirt is staying moist under the mulch.  The plants are growing and producing (we are waiting for our first ripe tomatoes on some plants).  We have had tomatoes to eat from our Juliets, Golden Raves, and Jelly beans.  We haven't had any slicers yet, but we are very patient. 

Oh, BTW we have picked our first tomato horn worm off this past week. 
The chickens relished him.

Wednesday, March 10, 2010

THE TAMING OF THE "SHREW"

This weekend the weather was fabulous in St. louis.  My main endeavor was to clean the green house of all the weeds that have grown over the winter.  I am a person that has to take a break every once in a while when doing heavy work.  Not a break to stop working, but a break to another job to give me perspective.  I took a look-see around the dormant garden that is showing tiny green of the perrineals besides the winter weeds (mainly chickweed, henbit and a nettle). 
   
I also wondered when I should trim the roses and there next to them was my next project.  The buddlea.  It was a huge mess.  I started working on it before I realized I should have taken a picture.  This picture is after I had trimmed off half of the tops so I could get in and decide how much I should do.
I have never cared much for this butterfly bush.  It is called "Pink Delight".  I have had others and this one does not have the smell or the dense blossoms the others have.  I have noticed it is not as full with blooms as the other varities I have had.
                                    
This is the Bush after I trimmed it.  I don't know if I did it correctly or not.  When I trimmed I noticed the center is dieing out.  I left quite a bit of growth because if we get a hard freeze in the next month it might freeze it back some.  Out side of its planting box is a new shoot coming up from the roots.  If this weather keeps up I will be able to dig it without damage around St. Patricks day.  The following pictures are are of visitors to the bush.
                                    
A swallowtail butterfly

A Humming bird moth.  Not the things we like to reproduce but they are sure beautiful.
An excellent article about them can be found here

A hornet

This is how the bush looks all summer.  No amount of dead heading increases the bloom.  The blooms on this variety do not seem to last as long as the others.  When this one is gone it will not be replaced in my main garden.  The discovered shoot will be planted by the gate.

Friday, February 19, 2010

SPRING PROGNOSTICATORS

I love lions in my yard,
I think they are just dandy,
Growing in nooks and crannies,
Even where it's sandy.

Their antics make me smile,
 Popping up where least expected,
They do aggravate that man of mine,
He roars, when the lawn he's neglected.

Fashioning with their blooms,
A necklace, when I was small,
Moments so pleasurable,
A memory I recall.

Years have passed, I am grown,
Every year I do remember,
The blossoms that delighted me,
From March to Novemeber.

My life is filled with sunshine,
Each spring when the lions return,
They are the prognosticators,
Of the warm weather I do yearn.

Saturday, February 6, 2010

BONES OF THE GARDEN


Our garden lies silent and serene,
Beds are barren, no longer green,
Hiding under the ice and snow,
Chickweed and henbit are rampant, I know.

The hay barn, very old and gray,
Looks somber in the light of day,
The snow covered mulch mound,
Like a beaver den on the ground. 


The scaffolding, normally covered in vines,
Looks so lonely at this time,
There will be no children hiding in there,
No happy sounds in the garden to hear.

Wind chimes sound hollow and cold,
Bringing images of gnomes of old,
Birds are quiet, no laughter in their voice,
This weather gives them no other choice.


My well of wishes is empty today,
I'll fill it with geraniums on a sunny spring day,
Smile to myself remembering this day,
"I'm glad winter's gone", I'll say.


The standing stone sits lonely and bare,
Normally covered with the plants growing there.
No birds visiting, perching on his top,
No Kittens crouched, ready to hop,

On unsuspecting little crawly things,
Which warm weather and sunshine bring,
Waiting for toads and lizards hiding there,
No kittens, in the sun, grooming with care.


The blackberries fenced to keep out the deer,
The snow covered ground keeps roots warm, never fear,
Last year, heavily burdened branches,
Invited the marauders, increasing their chances,

Of scoring a free meal,
With berries hanging in reach, to steal.

Our green house silently waits,
For us to open the garden gate,
Inviting everyone to see the plants within,
Bringing the owners a satisfied grin.


DIARY OF A DAY

Last night it snowed and we dodged a bullet.  We were on the southern edge of the massive storm system that is travelling across the midwest and heading to the east.  It will be dumping lot on the coast.  We had at least 3 inches of rain that was followed by a couple hours of slush...the stuff that fell looked just like a frozen slushy drink.  Then it was capped by 2 inchs of wet snow.  It would have made great snowmen except for the fact the sun came out very strong.  Our green house was 90 degrees by 10:30 AM.

These pictures were not here 2 hours later.


Today Hunny did me a favor.  He took all the pea and bean seed and prepared them for proofing.  to proof seeds you take a piece of paper towel moisten it and take 10 seeds out of the packet.  you fold them up in the toweling and place in a plastic bag and lable the bag so you know which is what.  Then you put them in a propagation chamber.

After three days we will open each package and check to see if any sprouting has started.  Then we will check every day.  Recording what we find.  The seeds will be given two weeks to grow.  The percentage of viability will be how many of the 10 seeds sprout in the 14 days.  We will record on each package the percentage, it will tell me how close together I will need to plant the seeds based on how viable they are.

Today we also washed up planting boxes.  I am using the plastic trays that you get when you buy chocolate covered graham crackers.  They will be filled tomorrow with planting medium and planted with lettuce.  each tray will be labled and covered with plastic wrap.  It will then be place under the dome of a sheet cake tray  (the large rectangle cake tray).  Then we will set it in a sunny window till they start to sprout.  When they sprout the plastic wrap comes off and they live under the dome, until transplanting at about 2 weeks

The following I took from another blog I posted at the beginning of the year. It was part of a seed starting blog.

Our propagation chamber is nothing fancy and it serves a variety of purposes. To build your own you will need the following:
Styrofoam ice chest
Heating Pad or an old working yogurt maker
Easy to read Thermometer
Piece of card board
serrated knife
something like the bottoms of egg cartons or something of that height.

CONSTRUCTION: We have found the same heat source works in a large cooler (ours is 28"x 16" x 17") but we also have those that are 12x12x18. In the bottom corner of the cooler make a hole just large enough for the plug of your heat source to slide through. If you have chosen your old yogurt maker you will only need the bottom half not the lid. Place it in the center of your cooler on the bottom. Now cut the card board (the serrated knife is good for this) to fit on top of the yogurt maker.(it should just barely slip into the cooler and rest on top of the maker.) You want the card board to be a shelf above your heat source. 

Now remove the card board and make a series of one inch holes in the cardboard. make them far enough apart that they will support the weight of the trays you will be sitting on top of it. If you have chosen a heating pad you will need something to support the cardboard about 2 inches above the pad. (I have used egg cartons without their tops for this.). Your chamber is finished.

Put your thermometer in side and turn on your heating source and find out what temp your propagation chamber keeps. We found sometimes we have to crack the lid. Now you need to scrounge for take-out plastic containers with clear raised tops. The 2 inch deep ones are great, allows for starting medium and a little sprouting room (sometimes they sprout in the middle of the night..lol) rectangle ones are preferable to round ones...you can put more in your cooler.  You can also use containers that don't have lids by covering them with plastic wrap.  BTW...you can stack them inside the cooler...but remember everyday twice a day to reverse who is on top and whose on the bottom so they get the same amount of heat. Keep your thermometer inside and check it first thing in the morning to make sure your cooler isn't accumulating too much heat. I didn't say this was a low maintenance project. (If you are adept I imagine you could fix this with a thermostat to turn off and on the heat and keep it at the perfect temp.

We have had 20 years of success with our homemade box, I hope this works as well for you.

Monday, January 25, 2010

GARLIC: ENOUGH TO KEEP THE VAMPIRES AWAY

This is another recipe to take away the winter blues while you peruse the seed catalogues.  Garlic is also something alot of people raise (Not us, the last few years, it has been too wet; even in raised beds we have had it rot.  Hopefully this fall we can put some in and have it survive.).  Till then I have to purchase mine. 


I haven't found many things I eat that don't improve with the addition of garlic. 
Think about it;  mashed potatoes with garlic, fresh garlic minced and saute'd with
Broccoli, green beans with bacon and minced garlic, and the list goes on. 
One day looking through my stacks of cookbooks I came across this recipe for a peasants soup. 
It had a goodly amount of garlic (3/4 cup) and a small amount of other veggies. 
I fixed it and was impressed but all the time I am thinking what can I do to make this my own. 

Garlic soup is like Chicken broth, it is satisfying when you feel bad.  It is also satisfying if you are on a diet and have the urge for something filling and slimming.  It freezes excellently.  In my experimenting with the original recipe I have found a myriad of ways to make it.  This is also an extremely cheap soup to make.  Except for the garlic (which can be bought cheaper at the stores like Sam's and Cosco's), the rest of the ingredients are items we have in our pantries at all times.

GARLIC SOUP

INGREDIENTS:

2 LBS Potatoes, peeled and quartered or eighth'd (if large). any variety will do. 
(Original recipe called for 1 1/2 lbs.)

4 Carrots (I use large carrots), washed not peeled, cut into 2 inch lengths. Ends trimmed off.
(Original recipe called for 2) 

1 cup garlic cloves (approximately 3 heads). Peel by smashing with a knife. 
Leave the cloves whole do not mince or chop. (Original recipe called for 3/4 cup)

2 TBLS "fat", Oil (do not use olive oil), or butter, 
I have never used bacon drippings but I bet it would be great.

2 quarts "Liquid", water, chicken stock, beef stock, vegetable stock

EQUIPEMENT NEEDED

Soup pot with lid (at least 4 quarts)

Wide blade butcher knife for smashing garlic

Paring knfe for cutting the ends off the garlic and carrots,
and cutting potatoes and carrots in chunks

Vegetable peeler for peeling potatoes

Blender, processer, or sieve(foley mill), an immersion blender

Holey ladle

1.  The first thing you do is work on the garlic.  Peel it and get it ready.  Melt your butter in a soup pot (no smaller than 4 quarts).  Saute' the garlic till golden, do not make it dark you will ruin the flavor of the soup.  BTW DO NOT ADD ANY SALT .

2.  When the garlic is golden pour in the two quarts of liquid.  Each different stock changes the flavor of the finished product but all are good, even plain water.

3.  While the liquid and garlic are coming to a boil prepare your vegetables adding them to the pot of liquid.  Bring all to a boil and turn down to a simmer.  Cover and slow simmer for one hour. 

4.  At this point you can wait another hour and let it cool on the back of the stove (when it cools down it is easier to process). 

5.  Use what ever means you have for puree'ing the pot of soup.  When you have the entire pot pureed if you want return the contents to the pot and reheat to serving temperature adding salt to taste.  The original called for adding a cup of cream at this point.  To me it is an unnesessary step and doesn't add to the flavor of the soup. 

At this point I divide mine into containers the size we use.  I do not salt till serving.  This soup served with herb bread 

http://gloriouscreations.blogspot.com/search/label/COOKING%3A%20BREAD%20BAKING 

and a salad is the perfect lunch.  Serve it in a mug and it is the perfect snack in the afternoon.  When it is made with chicken broth you get the doupble whammy of the garlic and the chicken soup to keep away the cold and flu.  With the addition of the extra carrots you are getting extra vitamin "A". 

This soup looks and feels like cream soups.  And is much easier to make.

HINT: DONOT MAKE THIS AT NIGHT WHEN
PEOPLE ARE TRYING TO SLEEP

(It wakes up taste buds.  I am salivating just thinking about the smell. 
I made this at my mother's one night when I couldn't sleep. 
The next morning she said the smell kept her awake all night, making her hungry.)

Friday, January 22, 2010

CUCUMBERS: WHEN THEY AREN'T COOL

I didn't know whether to include this article in this blog or my other blog, http://www.gloriouscreations.blogspot.com/ . 
I post recipes on both blogs.  The final decission
came down to our need for thoughts of spring and perusing the garden catalogs. 

It is cold and dreary with off and on rains in the St. Louis area.  Even my house feels damp.  Today I am organizing seeds, seeing which ones I want to use and making sure I have enough of those.  My mind is also thinking what to have for supper.  I am for sure going to have soup.  I'll break my arm patting myself on the back right now, I make really good soups.  Just ask me..lol.


 I ran to the fridge to see what was there that needed to be used up.  When I make un-planned soups I usually make them from what ever veggies are on their way to crossing over.  There on the shelf were two of those long hot house cucumbers.  They had gotten their ends froze from being on the wrong shelf.


Just recently I heard about cucumber bisque.  This is a soup served cold. I didn't think I was in the mood for a cold soup on a day like today.  I have cooked with cucumbers before, the resulting dish was excellent.  I decided to make a hot cucumber soup for tonight.


I cleaned the cukes, throwing the bad parts in the compost bucket.  Reached in the veggie bin, there was a bunch of celery that would be over the hill in the next week.  On the shelf was a plastic container that had accumulated the halves of onions I didn't need in other dishes.  A peek in the freezer revealed a bag of frozen peas that had about 10 ounces left in it.


I proceeded to assemble my soup.  I can't wait till supper to serve it.  My taste sample made me want to eat all I had prepared.

INGREDIENTS 

BASIC SOUP:
1 cup 1/4" diced celery
1 cup 1/4" diced onion (don't use red onion)
1 cup 1/4" cucumber (no seeds if you use regular cucumbers, do not peel)
Kosher salt
2 TBLS butter (you can use an oil with no flavor if you like)
1 can Swanson's chicken broth (Or home made with salt)
10 oz Frozen peas

BEFORE SERVING:
1 TBLS Butter
1/2 cup fine diced celery
1/2 hot house cucumber cut in 3/8" dice (do not peel)
Lemon Thyme (dried, rubbed, afterall it's winter right now)
Salt to taste

EQUIPEMENT
Heavy stainless pan (I used a 5 qt dutch oven)
heat proof rubber spatula
knives to slice and dice
blender

BASIC SOUP:

1.  In 2 TBLS Butter saute'  diced onions, celery, and cucumber (sprinkle with about 1/4 teas salt)  in your stainless pan till the oinion is soft and translucent.  Do not brown.

2.  Pour your can of broth in the pan and turn up the heat and simmer covered for about 3 minutes.  Turn off the heat and leave it for about 3 minutes. 

3.  Pour into your hot broth the package of frozen peas.  Stir until the peas are defrosted. (do not apply more heat or cook in any way)

4.  Have your blender ready and put the contents of your stainless steel pan in the blender bowl.  (You can use a food processor too)  If your blender is not large enough do it, blend in small batches.  You want the contents thoroughly pureed. 

BEFORE SERVING:

Preheat your creamed soup bowls in a 200 degree oven (Or microwave them filled with hot water till the bowl is hot)

1.  Use your cleaned stainless steel pan, Saute' the fine diced celery till aldente', add the diced cucumber and and saute' till tender.  (you can cover the pan and finish them.) 

2.  When the veggies are saute'd add the pureed soup (being mine was stored in the fridge all afternoon I brought the soup back up to serving temp in the microwave.  I didn't want to sorch it in the pan or cook away the fresh taste.)  Add salt and lemon thyme to your taste.  I didn't add the lemon thyme I was in a hurry and forgot. 

The soup was very thick.  I could have added at least another 8 ounces of broth.  BTW...If you want vegitarian I would say add plain water and some salt.  I wouldn't add Veggie broth because it would add too many other vegetable flavors and muddy the flavor of the soup. 

With the addition of the other 8 ounces of broth; this amount of soup could serve 4 easily.

The flavor of the soup was outstanding.  Very spring and green tasting. I imagine the soup could be made with green zucchini too.  It was thick and satisfied my taste buds making them think they had indulged in cream soup.  In my other blog is a recipe for herb bread that would compliment this soup.  If you want to make it decadent, add a dollup of sour cream.

While eating the soup I thought a nice addition  to the basic soup would be a cooked potato blended in and a diced cooked potato added before serving. Crisp bacon bits might be good too.

If you try this quickie soup I hope it is as enjoyable for you as it was for us.  I will be posting my garlic soup recipe later this week. It's a fast to make soup too. It goes great with the herb bread.  In fact all the soups seam to be attracted to Herb, LOL.